Migrating To Github Pages

I started this website 20 years ago as a means to learn Django, which made sense, as at the time I wished to do everything myself: website and hosting, running my own mail server, dns server, and probably something else, too. Over time my desire to spend time on these activities dwindled, and I move my content to blogger.

Year by year I wrote fewer articles, and then it became years since I wrote anything. Perhaps it was the UI for blogger or the niggling feeling that Google could kill it off at any time, or perhaps it was having a kid. Eventually the libraries were no longer maintained. This weekend I opted to:

  • Remove as many libraries as possible
  • Move from Blogger to Github Pages

Intially I gave Jekyll a go, as GH Pages natively supports it, but Jekyll seems to be on its way out as a static site generator (e.g. the pagenate plugin hasn’t been updated in like 7 years, and you can’t natively use other plugsin in Github). I gave Hugo a go, and it worked incredibly well.

Here is an overview of what I had to do:

  • Read this page and follow almost all of the steps.
  • Created this script to download the full size images from Blogger. Run it with python src/download_images.py after installing by pip install requests. I had about 250MB of images, so beware if you have a lot, at Pages has a limit of 1GB storage.
  • Created this script to replace any remaining links to picasaweb or blogger with just the image name located next to it. You might not need to run this.
  • Leveraged a lot of concepts from the PaperMod theme, but kept the theme as close to my original theme as possible.
  • If you want to use an apex (’naked’) domain, then you need to use the entire Github Pages domain as your entire repo name. For example, username.github.io, or see here for an example
  • Added a custom domain, which I found the documentation to be a bit out of date. From what I remember just point the apex domain to Github’s IPs, and use a CNAME for the www subdomain.

Github IPs

  • 185.199.108.153
  • 185.199.109.153
  • 185.199.110.153
  • 185.199.111.153

Updating DNS records

apexdomain.jpg wwwdomain.jpg customdomain.jpg

Solved: slow build times from Dockerfiles with Python packages (pip)

I have recently had the opportunity to begin exploring Docker, the currently hip way to build application containers, and I generally like it. It feels a bit like using Xen back in 2005, when you still had to download it from cl.cam.ac.uk, but there is huge momentum right now. I like the idea of breaking down each component of your application into unique services and bundling them up - it seems clean. The next year is going to be very interesting with Docker, as I am especially looking forward to seeing how Google’s App Engine allows Docker usage, or what’s in store for the likes of Flynn, Deis, CoreOS, or Stackdock.

One element I had been frustrated with is the build time of my image to host a Django application I’m working on. I kept hearing these crazy low rebuild times, but my container was taking ages to rebuild. I noticed that it was cached up until I re-added my code, and then pip would reinstall all my packages.

It appeared as though anything after I used ADD for my code was being rebuilt, and reading online seemed to confirm this. Most of the items were very quick, e.g. “EXPOSE 80”, but then it hit “RUN pip -r requirements.txt”

There are various documented ways around this, from two Dockerfiles to just using packaged libraries. However, I found it easier to just use multiple ADD statements, and the good Docker folks have added caching for them. The idea is to ADD your requirements first, then RUN pip, and then ADD your code. This will mean that any code changes don’t invalidate the pip cache.

For instance, I had something (abbreviated snippet) like this:

# Set the base image to Ubuntu
FROM ubuntu:14.04

# Update the sources list
RUN apt-get update
RUN apt-get upgrade -y

# Install basic applications
RUN apt-get install -y build-essential

# Install Python and Basic Python Tools
RUN apt-get install -y python python-dev python-distribute python-pip postgresql-client

# Copy the application folder inside the container
ADD . /app

# Get pip to download and install requirements:
RUN pip install -r /app/requirements.txt

# Expose ports
EXPOSE 80 8000

# Set the default directory where CMD will execute
WORKDIR /app

VOLUME [/app]

CMD ["sh", "/app/run.sh"]

And it rebuild pip whenever the code changes. Just add the requirements and move the RUN pip line:

# Set the base image to Ubuntu
FROM ubuntu:14.04

# Update the sources list
RUN apt-get update
RUN apt-get upgrade -y

# Install basic applications
RUN apt-get install -y build-essential

# Install Python and Basic Python Tools
RUN apt-get install -y python python-dev python-distribute python-pip postgresql-client

ADD requirements.txt /app/requirements.txt

# Get pip to download and install requirements:
RUN pip install -r /app/requirements.txt

# Copy the application folder inside the container
ADD . /app

# Expose ports
EXPOSE 80 8000

# Set the default directory where CMD will execute
WORKDIR /app

VOLUME [/app]

CMD ["sh", "/app/run.sh"]

I feel a bit awkward for having missed something that must be so obvious, so hopefully this can help somebody in a similar situation.

TLS Module In SaltStack Not Available (Fixed)

I was trying to install HALite, the WebUI for SaltStack, using the provided instructions. However, I kept getting the following errors when trying to create the certificates using Salt:

'tls.create_ca_signed_cert' is not available.  
'tls.create_ca' is not available.

Basically, the ’tls’ module in Salt simply didn’t appear to work. The reason for this is detailed on intothesaltmind.org:

Note: Use of the tls module within Salt requires the pyopenssl python extension.

That makes sense. We can fix this with something like:

apt-get install libffi-dev  
pip install -U pyOpenSSL  
/etc/init.d/salt-minion restart

Or, better yet, with Salt alone:

salt '*' cmd.run 'apt-get install libffi-dev'  
salt '*' pip.install pyOpenSSL  
salt '*' cmd.run "service salt-minion restart"

The commands to create the PKI key should work now:

Created Private Key: "/etc/pki/salt/salt_ca_cert.key." Created CA "salt": "/etc/pki/salt/salt_ca_cert.crt."  

Finding The Same (Misspelled) Name Using Python/NLTK

I have been meaning to play around with the Natural Language Toolkit for quite some time, but I had been waiting for a time when I could experiment with it and actually create some value (as opposed to just play with it). A suitable use case appeared this week: matching strings. In particular, matching two different lists of many, many thousands of names.

To give you an example, let’s say you had two lists of names, but with the name spelled incorrectly in one list:

List 1:
Leonard Hofstadter
Sheldon Cooper
Penny
Howard Wolowitz
Raj Koothrappali
Leslie Winkle
Bernadette Rostenkowski
Amy Farrah Fowler
Stuart Bloom
Alex Jensen
Barry Kripke

List 2:
Leonard Hofstadter
Sheldon Coopers
Howie Wolowits
Rav Toothrapaly
Ami Sarah Fowler
Stu Broom
Alexander Jensen

This could easily occur if somebody was manually typing in the lists, dictating names over the phone, or spell their name differently (e.g. Phil vs. Phillip) at different times.

If we wanted to match people on List 1 to List 2, how could we go about that? For a small list like this you can just look and see, but with many thousands of people, something more sophisticated would be useful. One tool could be NLTK’s edit_distance function. The following Python script displays how easy this is:

import nltk
 
list_1 = ['Leonard Hofstadter', 'Sheldon Cooper', 'Penny', 'Howard Wolowitz', 'Raj Koothrappali', 'Leslie Winkle', 'Bernadette Rostenkowski', 'Amy Farrah Fowler', 'Stuart Bloom', 'Alex Jensen', 'Barry Kripke']
 
list_2 = ['Leonard Hofstadter', 'Sheldon Coopers', 'Howie Wolowits', 'Rav Toothrapaly', 'Ami Sarah Fowler', 'Stu Broom', 'Alexander Jensen']
 
for person_1 in list_1:
    for person_2 in list_2:
        print nltk.metrics.edit_distance(person_1, person_2), person_1, person_2

And we get this output:

0 Leonard Hofstadter Leonard Hofstadter  
15 Leonard Hofstadter Sheldon Coopers  
14 Leonard Hofstadter Howie Wolowits  
15 Leonard Hofstadter Rav Toothrapaly  
14 Leonard Hofstadter Ami Sarah Fowler  
16 Leonard Hofstadter Stu Broom  
15 Leonard Hofstadter Alexander Jensen  
14 Sheldon Cooper Leonard Hofstadter  
1 Sheldon Cooper Sheldon Coopers  
13 Sheldon Cooper Howie Wolowits  
13 Sheldon Cooper Rav Toothrapaly  
12 Sheldon Cooper Ami Sarah Fowler  
11 Sheldon Cooper Stu Broom  
12 Sheldon Cooper Alexander Jensen  
16 Penny Leonard Hofstadter  
13 Penny Sheldon Coopers  
13 Penny Howie Wolowits  
14 Penny Rav Toothrapaly  
16 Penny Ami Sarah Fowler  
9 Penny Stu Broom  
13 Penny Alexander Jensen  
11 Howard Wolowitz Leonard Hofstadter  
13 Howard Wolowitz Sheldon Coopers  
4 Howard Wolowitz Howie Wolowits  
15 Howard Wolowitz Rav Toothrapaly  
13 Howard Wolowitz Ami Sarah Fowler  
13 Howard Wolowitz Stu Broom  
14 Howard Wolowitz Alexander Jensen  
16 Raj Koothrappali Leonard Hofstadter  
14 Raj Koothrappali Sheldon Coopers  
16 Raj Koothrappali Howie Wolowits  
4 Raj Koothrappali Rav Toothrapaly  
14 Raj Koothrappali Ami Sarah Fowler  
14 Raj Koothrappali Stu Broom  
16 Raj Koothrappali Alexander Jensen  
14 Leslie Winkle Leonard Hofstadter  
13 Leslie Winkle Sheldon Coopers  
11 Leslie Winkle Howie Wolowits  
14 Leslie Winkle Rav Toothrapaly  
14 Leslie Winkle Ami Sarah Fowler  
12 Leslie Winkle Stu Broom  
12 Leslie Winkle Alexander Jensen  
17 Bernadette Rostenkowski Leonard Hofstadter  
18 Bernadette Rostenkowski Sheldon Coopers  
18 Bernadette Rostenkowski Howie Wolowits  
19 Bernadette Rostenkowski Rav Toothrapaly  
20 Bernadette Rostenkowski Ami Sarah Fowler  
20 Bernadette Rostenkowski Stu Broom  
17 Bernadette Rostenkowski Alexander Jensen  
15 Amy Farrah Fowler Leonard Hofstadter  
14 Amy Farrah Fowler Sheldon Coopers  
15 Amy Farrah Fowler Howie Wolowits  
14 Amy Farrah Fowler Rav Toothrapaly  
3 Amy Farrah Fowler Ami Sarah Fowler  
14 Amy Farrah Fowler Stu Broom  
13 Amy Farrah Fowler Alexander Jensen  
15 Stuart Bloom Leonard Hofstadter  
12 Stuart Bloom Sheldon Coopers  
12 Stuart Bloom Howie Wolowits  
14 Stuart Bloom Rav Toothrapaly  
13 Stuart Bloom Ami Sarah Fowler  
4 Stuart Bloom Stu Broom  
14 Stuart Bloom Alexander Jensen  
15 Alex Jensen Leonard Hofstadter  
12 Alex Jensen Sheldon Coopers  
13 Alex Jensen Howie Wolowits  
15 Alex Jensen Rav Toothrapaly  
13 Alex Jensen Ami Sarah Fowler  
10 Alex Jensen Stu Broom  
5 Alex Jensen Alexander Jensen  
15 Barry Kripke Leonard Hofstadter  
13 Barry Kripke Sheldon Coopers  
13 Barry Kripke Howie Wolowits  
12 Barry Kripke Rav Toothrapaly  
13 Barry Kripke Ami Sarah Fowler  
10 Barry Kripke Stu Broom  
14 Barry Kripke Alexander Jensen  

As you can see, this displays the Levenstein distance of the two sequences. Another option we have is to look at the ratio.

len1 = len(list_1)
len2 = len(list_2)
lensum = len1 + len2
for person_1 in list_1:
    for person_2 in list_2:
        levdist = nltk.metrics.edit_distance(person_1, person_2)
        nltkratio = (float(lensum) - float(levdist)) / float(lensum)
        if nltkratio > 0.70:
            print nltkratio, person_1, person_2

Which we can see the end result below:

1.0 Leonard Hofstadter Leonard Hofstadter  
0.944444444444 Sheldon Cooper Sheldon Coopers  
0.777777777778 Howard Wolowitz Howie Wolowits  
0.777777777778 Raj Koothrappali Rav Toothrapaly  
0.833333333333 Amy Farrah Fowler Ami Sarah Fowler  
0.777777777778 Stuart Bloom Stu Broom  
0.722222222222 Alex Jensen Alexander Jensen

February Sydney Python Presentation

In February I gave a presentation to about 80 people at the Sydney Python group hosted by Atlassian. Firstly, Atlassian’s office was beautiful, feeling a little like Google’s Sydney office, but with beer on tap instead of cereal dispensers. Secondly, the talk before me on Cython by Aaron Defazio was exceptionally interesting, garnering lots of questions from the audience. My presentation, more of a show and tell on piping location data to Google’s Latitude through App Engine, was also meant to subtly share my views on the need for innovation in the public sector (all sectors, really).

My slides are below. I used very little text in the slides, but you can probably catch what is going on. The response from the audience was favourable, and I thank Dylan Jay for giving me the opportunity to speak.

Migrate Custom Blog to Blogger

For the last ten years I have run this website from various systems. First it was on Wordpress, then Mambo, then Joomla, and since early 2006 it has been running on custom code written using Django. I used this site as a learning tool for Django, re-wrote it after gaining more knowledge of Django, and then re-wrote it again when Google released App Engine. However, I recently realised that for the last few years I have spent more time writing little features than actually writing. I have entire trips that I never wrote because I was too busy writing code.

This week it all changed. I did the unthinkable. I moved this website to Blogger.

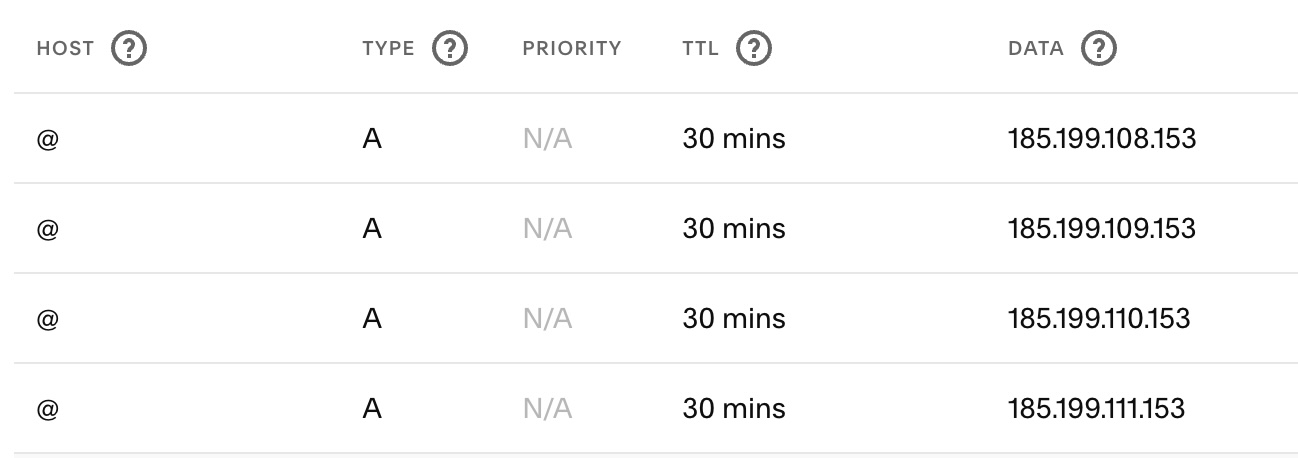
After evaluating some of the features of blogger, i.e. custom domains, location storing, ability to filter on labels, custom HTML/CSS, great integration with Picasa, and their mobile app, I realised I could virtually replace everything I had previously custom made.

This post gives a technical description how to migrate a site running Django, but readily applies to any blog running on custom code. I initially spent a fair bit of time trying to figure out how to convert my existing RSS feed into something Blogger could accept, but every solution required troubleshooting. I soon remembered why I love Django so much, and that it would be trivial to generate the correct XML for import.

  1. Create Blogger Template
    I wanted to keep my design, so I hacked it to support Blogger. Take one of the existing templates, edit the HTML, and adjust it for your design. If you’ve worked with templates before this shouldn’t be too difficult.
  2. Generate Sample XML
    The first step was to generate a sample XML file from Blogger to see what would be needed for import. Create a sample post with a unique name and a few labels, and location. In Blogger, go to Settings->Other and click Export Blog. The first 90% of the file will be for your template and other settings, but eventually you will find a section with entry elements in it. Copy this sample element out - this will become your template.
  3. Format Template
    Using the sample section from the blog export, format it so the view you will create populates it correctly. A note of caution: the template needs time in ISO 8601 format, you need the id element, and the location element needs coordinates if there is a name. It won’t import later if there is a name with no coordinates. My template looks like this:

feeds/rss.html

{%  load blog_extras %}
{% for entry in entries %}
    tag:blogger.com,1999:blog-1700991654357243752.post-{% generate_id %}
        {{ entry.publish_date|date:"Y-m-d" }}T10:30:00.000123
        {{ entry.publish_date|date:"Y-m-d" }}T10:30:00.000123
        {% for tag in entry.tags %}
            {% endfor %}

        {{ entry.title }}
        {{ entry.content }}


        Joe Bloggs
            https://plus.google.com/12345689843655881853
            [email protected] 
{% endfor %}

This isn’t really RSS, so if you are pedantic you can name it something else. You will notice I loaded some template tags in there (“blog_extras”). This is for generating the random number, as this is needed for the ID element.. Here’s the template tag.

blog_extras.py

# 'import random' at beginning of file
def generate_id():
    id = ""
    for x in xrange(1, 7):
        id = id + str(int(random.uniform(400, 900)))
    id = id + "8"
    return {'obj': id}
register.inclusion_tag('blog/generate_id.html')(generate_id)

/blog/generate_id.html

{{ obj }}
  1. Create Code To Populate View

This section should be easy if you have written your blog in Django. Simply populate the template, what I have shown as “rss.html” above

blog/views.py

def show_rss(self):
    q = Entry.all()
    q = q.filter("genre !=", "blog")
    entries = q.fetch(500)
    return render_to_response("feeds/rss.html", {
        'entries': entries,
        }, mimetype='text/plain')

I did a filter on the model to not include “blog” entries - these are my travel stories, and I exported them separately. Remember that this is all happening on App Engine, so you will need to adjust if using Django’s normal ORM.

  1. Download Entries

Visit the URL you mapped to the “show_rss” function in urls.py, it should generate your list of entries. Copy and paste those entries into the exported XML from Blogger where you took out the original entry element.

  1. Import Entries

Now go to Blogger and import your blog. With any luck you will have imported all your entries. You will probably need to do this a few times as you tweak the text. I had to remove some newlines from my original posts.

Optional Steps

  1. Create Redirect URLS
    Links in Blogger appear to only end in .html, which is a problem for links coming from Django. Luckily, Blogger includes the ability to add redirects. Go to Settings->Other-Search Preferences. You can then edit redirects there. I generated a list of my old URLs and combined that with a list of the new URLs. Hint: you can use Yahoo Pipes to extract a list of URLS from a RSS feed. If you open any of the links in Excel and split on forward slashes, remember that it will cut off leading zeros. Set that field to TEXT during import.

I decided not to create redirects for every entry, as I didn’t really have time, and it only probably matters if somebody links directly to that page. I opened Google Analytics and looked at the Search Engine Optimisation page and sorted it by the most used inbound links. After getting down to entries that only had 1 inbound request per month I stopped creating redirects.

  1. Host Stylesheets and Images Externally

Blogger won’t host host files, so you need to work around this problem. All my images are generally from Picasa, except very specific website related ones. I moved those to Amazon’s S3 and updated the links. I did the same with my CSS. You could probably store them in Google Storage, too.

  1. Create Filters on Labels

If you had any previous groupings you can still link to them using label searches (in my case I actually added the “genre” as a label). The syntax is “/search/label/labelname/”, as you can see in my howtos section link.

  1. Update Webmaster Tools

If your site is part of Google’s Webmaster Tools, you will want to login and take a look that things are OK. You will also probably want to update your sitemap (send Google your atom.xml feed).

Integrate imified into Django

I recently had the desire to send small updates to my so called lifestream page via XMPP/GTalk. I played around with Twisted Words and several other Python XMPP clients, but I didn’t really want to keep a daemon running if unnecessary. It turns out imified took a lot of the pain out of it. The steps for me were as follows:
Create an account with imified, and create a URL, e.g. /app/api/
We then configure the urls.conf

urlpatterns = patterns('',  
    (r'^app/api/$', bot_stream),
)

We then create the necessary views. So, in views.py:

from django.shortcuts import render_to_response
from django.http import HttpResponse
from lifestream.forms import *
from datetime import datetime
from time import time
 
def bot_stream(request):
    if request.method == 'POST':
        botkey = request.POST.get('botkey')
        username = request.POST.get('user')
        msg = request.POST.get('msg')
        network = request.POST.get('network')
    
    if username == "[email protected]" or network == "debugger":
        blob_obj = Blob(id=time(), body=msg, service_name="Mobile",
        link="http://www.kelvinism.com/about-me/", published=datetime.now())
        blob_obj.save()
        resp = "OK"
    else:
        resp = "Wrong username %s" % username
    else:
        resp = "No POST data"
    return HttpResponse(resp)

To complete this little example, you can see what I used for my models.py

class Blob(models.Model):
    id = models.CharField(max_length=255, primary_key=True)
    body = models.TextField(max_length = 1024, null = True, blank = True)
    service_name = models.CharField(max_length=50, null=True, blank=True)
    link = models.URLField(max_length=255, verify_exists=False, null=True, blank=True)
    published = models.DateTimeField(null=True, blank=True)
 
def __unicode__(self):
    return self.id
 
class Meta:
    ordering = ['-published']
    verbose_name = 'Blob'
    verbose_name_plural = 'Blobs'
 
def get_absolute_url(self):
    return "/about-me/"

It maybe isn’t super elegant, but it works just fine, and maybe can provide a hint if somebody else is contemplating using a homebuilt xmpp solution, or just pawning it off on IMified.

Hacking Splunk with Python

A few weeks ago I saw an opening to give a 5-10 minute lightening talk at SyPy (Sydney Python), and with two nights to prepare, decided it would be interesting to explore Splunk’s usage of Python. You can see it here

Using HTML in a Django form label

I recently had the need to add some HTML to the label for a form field using Django. The solution is pretty easy, except I didn’t see it written explicitly anywhere, and I missed the memo of the function I should be using.
My form first just had the HTML in the form label as so:

from django import forms
 
class AccountForm(forms.Form):
    name = forms.CharField(widget=forms.TextInput(), max_length=15, label='Your Name (<a href="//www.blogger.com/questions/whyname/" target="_blank">why</a>?')

However, when I displayed it, the form was autoescaped.

This is generally a good thing, except my form obviously didn’t display correctly. I tried autoescaping it in the template, but that didn’t work. To resolve this you’ll need to mark that individual label as safe. Thus:


from django.utils.safestring import mark_safe
from django import forms
 
class AccountForm(forms.Form):
    name = forms.CharField(widget=forms.TextInput(), max_length=15, label=mark_safe('Your Name (<a href="//www.blogger.com/questions/whyname/" target="_blank">why</a>?)'))
    

It will now display correctly:

In [1]: from myproject.forms import *
 
In [2]: form = AccountForm()
 
In [3]: form.as_ul()
Out[3]: u'
<li><label for="id_name">Your Name (<a href="//www.blogger.com/questions/whyname/" target="_blank">why</a>?):</label> <input id="id_name" maxlength="15" name="name" type="text"></li>
'

There’s maybe another easier way to do this, but this worked for me.

Ubuntu 10.04, Django and GAE - Part 1

I’ve started to get into Google’s App Engine again, and have started developing a simple product that I had a use for. The initial first draft was a quick 200 lines in webapp, and it worked great. However, I’m starting to find certain things quite cumbersome. I’m a huge fan of Django, and but also about keeping things as simple as possible, which is why I picked webapp to begin with.
I’m now considering making a swap to Django, but there are some development issues; namely, I’m using Ubuntu 10.04, Python 2.6, and Django 1.2. This setup presents several setbacks, as GAE has the requirement of Django 1.1 and Python 2.5. There are two solutions that I found: a) use virtualenv, which I’ve detailed, or b) chroot. This document will hopefully show how to configure a chroot environment of Ubuntu 9.10 and prepare it for Django on GAE. Using a jailed environment should allow you to edit your code with your normal IDE and VCS, but use Django 1.1 and Python 2.5.
First, I installed schroot and debootstrap.

$ sudo apt-get install schroot debootstrap

Second, I edited /etc/schroot/schroot.conf and added the following section to the end.

[karmic]
description=karmic
type=directory
location=/var/chroot/karmic
priority=3
users=kelvinn #your username goes here
groups=admin
root-groups=root
run-setup-scripts=true
run-exec-scripts=true

Third, I created the directories needed for the jailed environment and installed karmic.

$ sudo mkdir -p /var/chroot/karmic
$ sudo debootstrap --arch i386 karmic /var/chroot/karmic

Forth, I logged into the jailed environment and updated packages, installed Python 2.5 / Django 1.1. Make sure to note that I don’t call ‘python’, I call ‘python2.5’.

$ sudo schroot -c karmic
(karmic)root@kelvinn-laptop:~# apt-get update
(karmic)root@kelvinn-laptop:~# apt-get install python2.5
(karmic)root@kelvinn-laptop:~# cd /usr/src
(karmic)root@kelvinn-laptop:~# apt-get install wget
(karmic)root@kelvinn-laptop:/usr/src# wget http://www.djangoproject.com/download/1.1.2/tarball/
(karmic)root@kelvinn-laptop:/usr/src# tar -xpzf Django-1.1.2.tar.gz
(karmic)root@kelvinn-laptop:/usr/src/Django-1.1.2# python2.5 setup install
(karmic)root@kelvinn-laptop:/usr/src/Django-1.1.2# exit

Lastly, I log in as my normal user, and start the app. Let’s say I have a folder called ‘~/gaeapps’ for my GAE stuff, and that’s where I put the SDK.

$ scroot -c karmic
(karmic)kelvinn@kelvinn-laptop:~/gaeapps$ ls
google_appengine  myproject
(karmic)kelvinn@kelvinn-laptop:~/gaeapps$ google_appengine/dev_appserver.py myproject