Retiring Old Websites

Sometimes all good things come to an end. There aren’t too many links going into either of these sites, but I’d like to redirect all of them to a page on my blog saying the website doesn’t exist anymore. I’ve already created simple screendumps for nostalgic purposes with the Firefox plugin Screengrab!, so the remaining simple server-side steps are:

  1. Edit the DNS records from the live server to the server with the notice page is on.
  2. Create a new vhost on the server the notice exists on, add old websites as ServerAlias.
  3. Add a redirect in the vhost to the notice about the retired sites.
  4. Reload apache config.

The below vhost entry will redirect any link to the retired sites to the notice page.

ServerName ducktracker.com
ServerAlias www.ducktracker.com blogmozaic.com www.blogmozaic.com
RedirectMatch permanent (.*)$ http://www.kelvinism.com/tech-blog/rip-old-sites/ 

Reduce Bandwidth By Shrinking Images

A friend has a simple WordPress-based website that I set up for him a few year ago - and he likes to post a lot of images. For various reasons I have it hosted on my VPS in Australia, which only comes with 15GB of bandwidth, most likely because I got a crazy good deal on it.

The problem is, that isn’t much bandwidth. Each page of his site was previously using almost 10MB of bandwidth per view - which meant the 15GB was running out. I deduced the high usage in Firebug and noticed it was gasp from large images, some almost 1MB large. The images on the server are contained in subdirectories under a gallery folder - and I wanted to resize them. What I actually wanted to do was:

  1. If the image was over 1024x900, resize it.
  2. If the image size (bytes) was over X, lower the quality.

I ended up using ImageMagick, which is what first obviously came to mind for image manipulation. While there is likely a better way to resize all the images, this is what I came up with. Maybe somebody else will find it useful too.

for dir in /home/vhosts/website.com/html/wp-content/gallery/*
do
cd $dir
for filename in *.jpg
do
echo Filename: "$filename"
width=`identify -ping -format %w "$filename"`
height=`identify -ping -format %h "$filename"`
if [ $width -ge 1024 -a $height -ge 900 ]; then
convert "$filename" -resize "%80>" "$filename"
echo New Dimensions: $width x $height
fi
filesize=`stat -c%s "$filename"`
if [ $filesize -ge 414981 ]; then
convert "$filename" -quality 90 "$filename"
echo Old Filesize: $filesize
echo New Filesize: `stat -c%s "$filename"`
fi
done
done

Save it as “resize.sh” and run it with “bash resize.sh”. The output:

Filename: img_5364.jpg
Old Filesize: 950748
New Filesize: 331426
Filename: img_5366.jpg
Filename: img_5367.jpg
Filename: 1c10_1.jpg
Filename: 1.jpg
Filename: 2752_1.jpg
Filename: 42920014.jpg
New Dimensions: 1544 x 1024
Filename: 42920017.jpg
New Dimensions: 1544 x 1024

Vortex86DX Instructions from ICOP

Alexandru T. and I have exchanged a few emails, and he sent through a few helpful suggestions that were provided from ICOP. I have included them below. Thanks Alexandru!

  1. Install Debian 5.0 on a normal PC (using a netinst image, for minimal install)
  2. After installation boot normally from the same PC
  3. Then, take the kernel from ftp://icop.com.tw/DIS_info/VDX/operating_system/VDX_Linux/linux-image-2.6.30-vortex86mx_1.0_i386.deb and then issue the following commands :
# dpkg -i  linux-image-2.6.30-vortex86mx_1.0_i386.deb
# update-initramfs -k 2.6.30-vortex86mx -c
# update-grub
# restart
  1. Then take the hard-drive and install it on the Vortex86DX
  2. When GRUB menu appears, press “e” and modify the boot loader as follows :
root        (hd0,0)
kernel        /boot/vmlinuz-2.6.30-vortex86mx root=/dev/hdb1 ro         --> if hdb1 does not work you can try (hda1= Primary Master or hdc1=Secondary Master)
initrd        /boot/initrd.img-2.6.30-vortex86mx

Then press b to boot

  1. After booting, go to /boot/grub/menu.lst and make modifications from above permanently, so you will boot without any intervention ;)

**Edit:**Bob A. has also sent through some additional resources for your eboxing pleasures.

FYI - this Swedish company, http://www.lweb.se/tag/ubuntu/, has a pre-made ISO for Ubuntu 8.04LTS with the correct kernel for the eBox 3300/3310. It even supports the new (1011) IDE controller on the recent models. You can just put the ISO on a thumb drive, stick it in your eBox, and install normally. No need to install first on another machine, and no need to update the kernel after you’re done. If you’re happy with running 8.04 then this is way easier than any other install option that I’ve found
so far.

Lenny on Ebox 3310A

As a preface, I take absolutely no credit for the below instructions. Stefan L kindly sent these through these instructions on installing Debian on the 3310A. I need to send a special thanks to Stefan, as I receive a lot of emails about the 3310 - but I don’t have one, so I can’t really do much:

The only edit I’ve done is change out the links to my files on S3. If you find these helpful, or want to suggest an alteration, please leave a comment.

Download these files first:

EDIT 16-03-2025: I have since removed these files.

The steps to install Lenny to CF in brief is:

  1. Install i386 version of Lenny to CF on another computer
  2. Add the revised kernel deb with dpkg -i *.deb
  3. Change fstab from hda1 to sdb1 (sda1 if there is no micro sd card) - uuids may be better
  4. Change /boot/grub/menu.lst to:
title           Debian GNU/Linux, kernel 2.6.31.5-vortex86-sl3
root            (hd0,0)
kernel          /boot/vmlinuz-2.6.31.5-vortex86-sl3 root=/dev/sdb1 ro verbose
  1. Probably need to change /boot/grub/device.map
(hd1)   /dev/sda
(hd0)   /dev/sdb

With no micro sd it would be:

(hd0) /dev/sda
  1. delete the section below “# PCI device ….” in /etc/udev/rules.d/70-persistent-net.rules (Otherwise the eBox network gets remapped to eth1 and may not appear if only eth0 is specified in the network settings)
  2. Reboot & pray The next one is a revised initrd for the current Ubuntu 9.10: http://staff.washington.edu/lombaard/initrd.img-2.6.31-14-generic-pata_rdc. (EDIT 12-03-2025: Lost my image that was linked from here). The two changes are: blacklist dm_raid45 & add pata-rdc.ko “blacklist dm_raid45” needs to be added to /etc/modprobe.d/blacklist.conf I managed to boot into gnome desktop without any further problems. I have enabled PCI IDE Bus Mastering, plug&play and IDE native mode in the bios. Hope this saves someone else a few hours of frustration.

New Atheros Module and Ubuntu

I’ve been using Atheros for quite some time, and I’ve always liked the madwifi drivers. They allowed really easy switching into monitor mode, and decent levels of packet injection. However, since I’m mostly in an office now, instead of writing web apps in cafes and trying to score free internet, I don’t really need anything fancy. My gentoo stage 1 (3?) days are over. I use Ubuntu, because I’m lazy, and it mostly works.

My new laptop (well, 1.5 year old laptop now, but still new in my eyes) gave me the option between an Intel card and a Atheros wifi card. I chose the Atheros card; then the ath5k module came out, and life has been turbulent ever since.

In summary: the ath5k driver in the 2.6.28 kernel, which is what Ubuntu 9.04 uses, isn’t as up-to-date as the drivers in compat-wireless. Fancy that… This presents me with the option of compiling a new kernel specifically with it, or just installing compat-wireless. I’m lazy, so…

I’ll get a few basic troubleshooting commands out of the way first. After updating the kernel I kept getting disconnected - it appeared I was associate/disassociating frequently.

# dmesg
...
2577.134060] wlan0: associated
[ 2580.984838] wlan0: disassociating by local choice (reason=3)
...
# lspci | grep Atheros
03:00.0 Ethernet controller: Atheros Communications Inc. AR5212 802.11abg NIC (rev 01)
# ping 192.168.1.1
...
64 bytes from 192.168.1.1: icmp_seq=2409 ttl=64 time=1.13 ms
64 bytes from 192.168.1.1: icmp_seq=2410 ttl=64 time=2236.61 ms
64 bytes from 192.168.1.1: icmp_seq=2411 ttl=64 time=4562.40 ms
64 bytes from 192.168.1.1: icmp_seq=2412 ttl=64 time=6521.868 ms
...

The steps to resolve are as follows:

  1. Make sure you have headers for your current kernel.
  2. Make sure you have ability to compile programs.
  3. Download and install compat-wireless
  4. Unload and load the module.

So, first, use Synapitc to get the latest kernel headers and the ‘build-essential’ packages.

Next, download the compat-wireless package. I needed to use one from a few weeks ago because I received the following error:

make -C /lib/modules/2.6.28-15-generic/build M=/usr/src/compat-wireless-2009-09-22 modules
make[1]: Entering directory `/usr/src/linux-headers-2.6.28-15-generic'
CC [M]  /usr/src/compat-wireless-2009-09-22/drivers/net/wireless/b43/main.o
/usr/src/compat-wireless-2009-09-22/drivers/net/wireless/b43/main.c: In function 'b43_do_interrupt':
/usr/src/compat-wireless-2009-09-22/drivers/net/wireless/b43/main.c:1888: error: 'IRQ_WAKE_THREAD' undeclared (first use in this function)
/usr/src/compat-wireless-2009-09-22/drivers/net/wireless/b43/main.c:1888: error: (Each undeclared identifier is reported only once
/usr/src/compat-wireless-2009-09-22/drivers/net/wireless/b43/main.c:1888: error: for each function it appears in.)
/usr/src/compat-wireless-2009-09-22/drivers/net/wireless/b43/main.c: In function 'b43_request_firmware':
/usr/src/compat-wireless-2009-09-22/drivers/net/wireless/b43/main.c:2218: warning: format not a string literal and no format arguments
/usr/src/compat-wireless-2009-09-22/drivers/net/wireless/b43/main.c: In function 'b43_wireless_core_start':
/usr/src/compat-wireless-2009-09-22/drivers/net/wireless/b43/main.c:3867: error: implicit declaration of function 'request_threaded_irq'
make[4]: *** [/usr/src/compat-wireless-2009-09-22/drivers/net/wireless/b43/main.o] Error 1
make[3]: *** [/usr/src/compat-wireless-2009-09-22/drivers/net/wireless/b43] Error 2
make[2]: *** [/usr/src/compat-wireless-2009-09-22/drivers/net/wireless] Error 2
make[1]: *** [_module_/usr/src/compat-wireless-2009-09-22] Error 2
make[1]: Leaving directory `/usr/src/linux-headers-2.6.28-15-generic'
make: *** [modules] Error 2

You can download a working 2009-09-05 set from orbit-lab.org

# tar -xpjf compat-wireless-2009-09-05.tar.bz2
# cd compat-wireless-2009-09-05
# make
# make install
# make unload
# modprobe ath5k

All done. My variable ping times and random disconnections seem to have been mitigated. Thanks wireless guys!

Remove Dead Tags

I’ve noticed my django-tagging install has been giving a lot of empty entries when doing a lookup on a tag. Tonight I finally got around to looking at what was causing this. This is surely not the best way to do this, but at 12:00am on a weekday, well, I shouldn’t be doing it in the first place… I first wanted to see what type of content was generating the error:

for item in TaggedItem.objects.all():
    try:
        print item.object
    except:
        print item.content_type_id

Now that I could see what was causing it (I had removed an app that used django-tagging, but it left the tags with empty pointers). Removing the empty tags was easy enough:

for item in TaggedItem.objects.all():
    try:
        print item.object
    except:
        item.delete()

No more hanging TaggedItems.

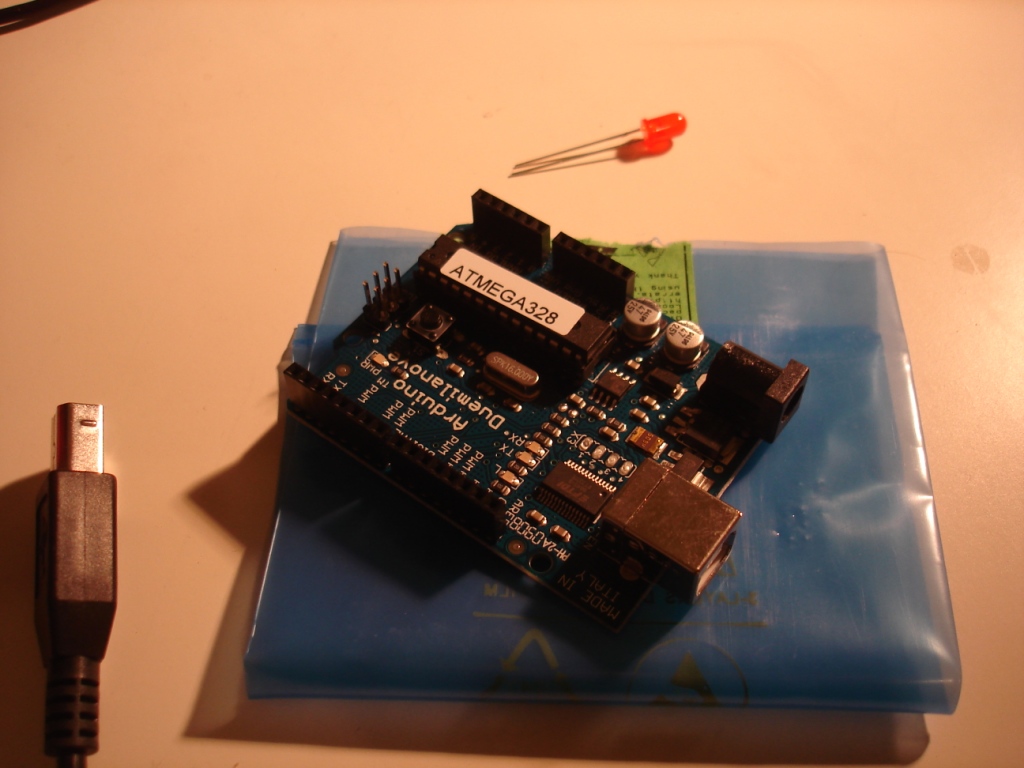
Simple Arduino + LED Tutorial

For this you’ll need: an Arduino, an LED, a USB cable, and the Arduino software.

  1. Get the LED, and plug it in to your Arduino. Plug in the long end to pin 13, plug the short end to the GND.
  2. Plug in the Arduino into your laptop. Go to Tools->Serial Port. Choose the USB port that appears.
  3. Take the code from the BlinkingLED tutorial and paste it in to the arduino like so:

  1. Hit File->Upload to I/O Board.
  2. Hit (physically) the little reset button. Voila! a blinking LED!

ISO Code Error

I’ve received this error a few times when working with pytz:

Error reading file '/usr/share/xml/iso-codes/iso_3166.xml'

In short, install the ‘iso-codes’ package in Ubuntu/Debian. I’m sure this is covered in the manual that I didn’t read, but I’m sure others didn’t read it too.

apt-get install iso-codes

Installing Debian 5.0 on Vortex86DX

After writing about compiling a new kernel for the Vortex86DX, I’ve had quite a few people email me asking how I installed Debian in the first place. The installation is actually quite straightforward, but it involved several quirky techniques. After doing another install I decided to keep track of the process of installing Debian 5.0 on my eBox-3300.

The following guide assumes a few things. First, you are currently using Linux and a debian variety (although instructions could be altered if using Windows). Second, your USB shows up as /dev/sdb. Third, your eBox-3300 has the HDD set in Native mode. Forth, you are patient.

  1. Download the custom vmlinuz and initrd.gz files from my site. Also, download the custom deb files we’ll use near the end of installation:
http://cdn.kelvinism.com/ebox/vmlinuz
http://cdn.kelvinism.com/ebox/initrd.gz
http://cdn.kelvinism.com/ebox/linux-headers-2.6.29.3-vortex86dx.deb
http://cdn.kelvinism.com/ebox/linux-image-2.6.29.3-vortex86dx.deb

EDIT 16-03-2025: I’ve since removed these files.

  1. Download an i386 netinst iso:
http://www.debian.org/CD/netinst/
  1. Make sure the USB has an MBR installed:
apt-get install syslinux mtools mbr
install-mbr /dev/sdb
  1. Format the device as FAT32 with whatever tool you like.
  2. Run syslinux on it:
syslinux /dev/sdb1
  1. Mount the USB (or pull it out and plug it in again so it shows up on your desktop), and copy the downloaded vmlinuz, initrd, netinst.iso and deb files onto the USB. There should be a file called ldlinux.sys already; create a file called syslinux.cfg and put the following in it:
default vmlinuz
append initrd=initrd.gz root=/dev/rd/0 devfs=mount,dall rw DEBCONF_PRIORITY=medium
  1. Unmount the USB, and put it in your eBox-3300. When the system boots up initially, hit F11. Select your USB device. Depending how you created the MBR it might come up as saying “MBR FA:”. Press “A”. When 1234F comes up, press “1”. Press enter at the SYSLINUX “boot:” screen.
  2. Proceed as normal through the menu. It will search for an ISO image, and should detect the netinst image you inserted earlier. When you get to the “Load installer components” section, it will complain about no kernel modules found. Select YES. On the next screen you shouldn’t need to load any components, so hit continue. Proceed as normal.
  3. If you are ever asked about starting PC card services, hit NO. Proceed as normal.
  4. Eventually you will hit a screen that says LVM is not available, hit CONTINUE. Proceed as normal.
  5. Near the end it will toss up a list of available kernels. Select either, it shouldn’t matter. When you are allowed to select drivers to include in the initrd, select TARGETED. Proceed as normal.
  6. You might get to a point where it says Install GRUB boot loader on a hard disk. This will fail. That’s ok, just skip it and select “continue without boot loader”.
  7. You will end up on the “Finish the installation” menu. DO NOT finish! We now need to swap out the current kernel with one that works. Scroll down and select “Execute a shell”. Press CONTINUE. Try these steps when the shell prompt appears:
cd hd-media
cp *.deb /target/usr/src/
cp vmlinuz /target/boot/vmlinuz-2.6.26-2.486
cp initrd.gz /target/boot/
cd /target/boot
gunzip initrd.gz
mv initrd initrd.img-2.6.26-2-486
reboot

Your system will now reboot, and it should actually boot correctly. However, you’re using a kernel that doesn’t have any headers or modules, which means you can’t activate anything. Once the box boots up, login and install the included custom kernels:

cd /usr/src
dpkg -i linux-image-2.6.29.3-vortex86dx.deb
dpkg -i linux-headers-2.6.29.3-vortex86dx.deb
reboot

Once the system comes back up, you should be running a spiffy 2.6.29 kernel, with the ability to add modules.

You may want to follow the tuning section from the MicroClient page on Google Groups. I also modified my fstab file to help reduce wear on the CF card:

tmpfs /var/run tmpfs defaults,noatime 0 0
tmpfs /var/lock tmpfs defaults,noatime 0 0
tmpfs /var/tmp tmpfs defaults,noatime 0 0

Contribution 1: Francois Fleuret emailed through a kind reminder that the qemu-onto-SD card method is a viable option. So, if you want to go the SD route, and have an SD reader, this might be what you’re after!

Basically, install Debian on a SD card with qemu (start qemu with the
install disk iso as cdrom and the SD card as hda), while you are still
in qemu, download and install the kernel deb file

ftp://ftp.icop.com.tw/upload/Shawn/linux-image-2.6.27.9-vortex86dx_2.6.27.9-vortex86dx_i386.deb

then quit qemu, put the SD card in the box and reboot. You are done!

EDIT 16-03-2025: I have since removed these files.

If you want the source file for the above kernels, you can get it from here: 2.6.29-3 source. I recently recompiled the kernel with some extra modules enabled (e.g. ecryptfs), so if you would like to try a newer kernel, you can download my updated kernels too:

http://cdn.kelvinism.com/ebox/linux-headers-2.6.30.4-vortex86dx.deb
http://cdn.kelvinism.com/ebox/linux-image-2.6.30.4-vortex86dx_2.6.30.4.deb

EDIT 16-03-2025: I have since removed these files.

Contribution 2: Trent L has also recompiled a 2.6.28 kernel with wireless extensions built into it, which is what was needed for his wireless card. He has kindly allowed me to distribute them; you can find them here:

http://cdn.kelvinism.com/ebox/linux-source-2.6.28.10_vortex86dx.deb
http://cdn.kelvinism.com/ebox/linux-image-2.6.28.10_vortex86dx.deb
http://cdn.kelvinism.com/ebox/linux-headers-2.6.28.10_vortex86dx.deb
http://cdn.kelvinism.com/ebox/2.6.28.config

EDIT 16-03-2025: I have since removed these files.

Contribution 3: If you have the ebox-3310, you can still read through this, but you may also want to see a suggested installation method and kernels from Stefan.

Contribution 4: Alexandru T. sent through some instructions directly received from ICOP. I’ve added another page with the details. Thanks Alex!

Contribution 5:: Rainbow sent through the solution if your kernel panics with:

it report "kernel bug at fs/buffer.c 1864" and system go mad, even
> "halt" "reboot" take no effect.

Rainbow reported that:

this issue cause by an error Vcore, 0.90v refered by datasheet, and it should be above 0.97.

Contribution 6:: Bob’s also sent through his config file.

Contribution 7: Bob A. has sent through some resources about a special ISO specific for the ebox. It has been added to another page.

Update: I’ve needed to recompile a new Lenny vortex86dx-enabled kernel for 2.6.31.5: image, headers, source and config.
Create a Movie from Images

I’ve started leaving my webcam on as a motion detector to find out who is leaving the shopping cards on our lawn, and ultimately have found it useful to stitch the images together into a movie. There are several ways to do this - and my way maybe isn’t the best - but it works for me.

I first installed and configured motion, which I’ve used for years. I then created a file in ~/.motion called motion.com:

$ cat ~/.motion/motion.conf

height 480
width 640
framerate 2

By creating this file, it allows me to start motion without modifying the global motion.conf file permissions, or gasp running it under sudo. There are lots of options you can put in your motion.com file.

With motion installed, and configured, now install mencoder.

I prefer to generate a seed file based on the creation date for each image. If you try to use mencoder with just a *.jpg, it works, but my video jumped around.

$ pwd
/home/path/Desktop/motion
$ ls -rt *.jpg > list.txt

This list.txt file now has the filenames, in chronological order, ready for consumption. I create the video like so:

mencoder mf://@list.txt -o `date +%G%m%d`.avi -ovc lavc -lavcopts vcodec=mjpeg

This will output a file with today’s date in a few seconds. Remember, the `’s are the key by the #1, not quotes.